Misc. -Users
Overview
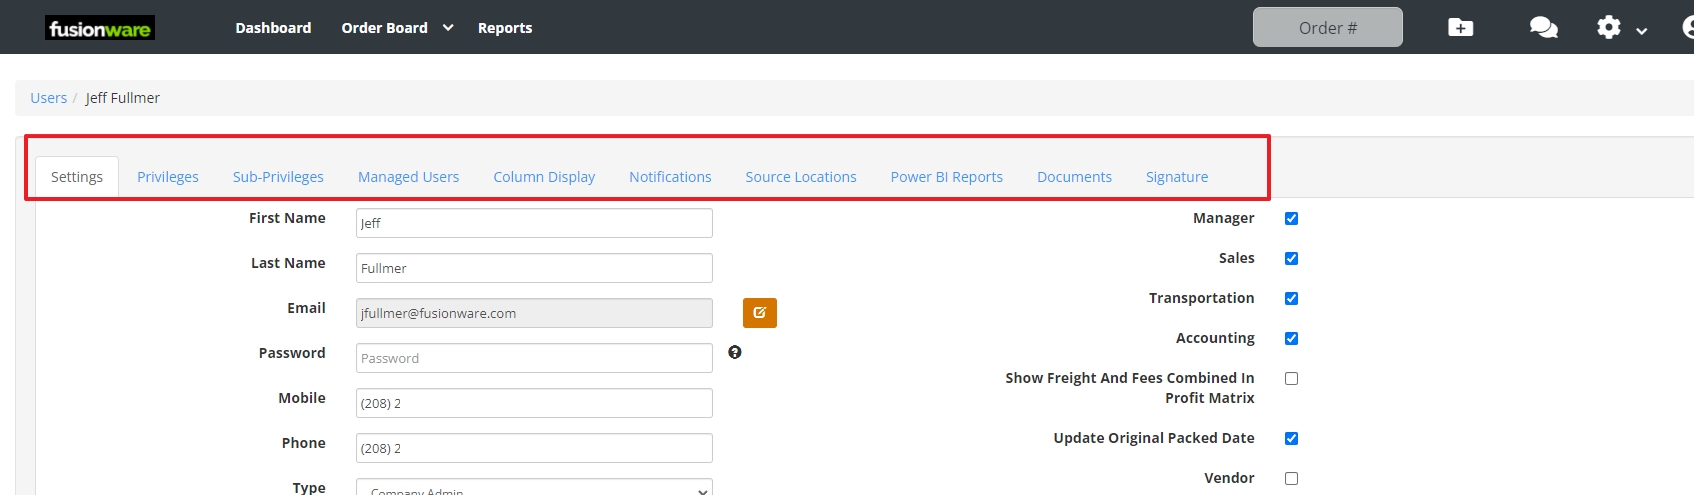
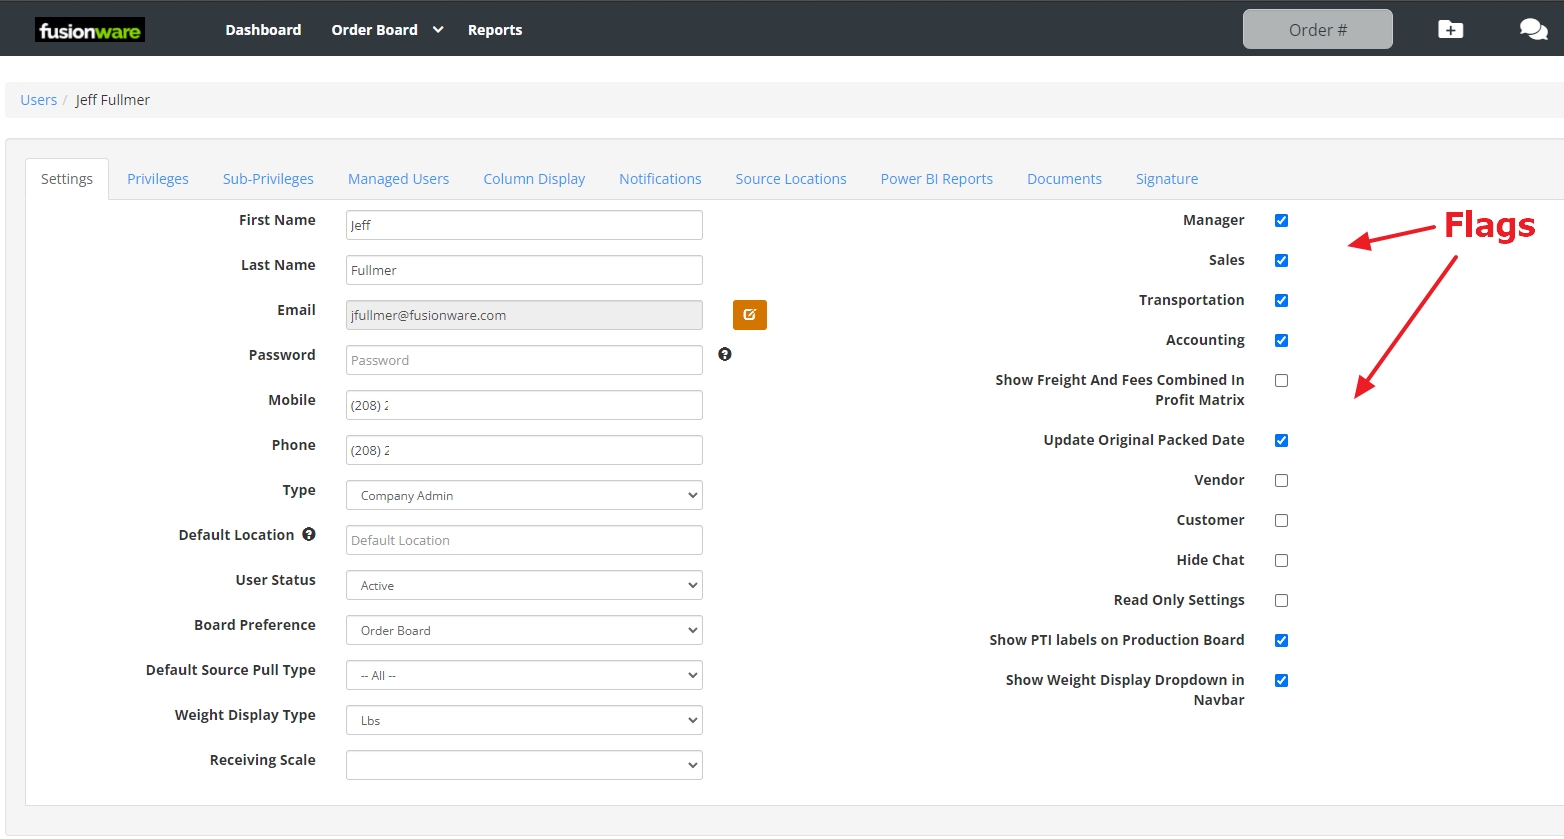
User Settings Tab
| Field Name (Left Column) | Description |
|---|---|
| First Name | Enter the first name of the user. |
| Last Name | Enter the last name of the user. |
| Enter the email of the user. | |
| Password | Must contain at least 8 characters,1 uppercase and 1 special character. |
| Mobile | Cell phone number is required if user is signing documents. |
| Phone Number | Enter the phone number of the user. |
| Type | Enter the type of user (Company Admin, Company Users). |
| Default Location | This is the location the user wants as a default for the inventory report. |
| User Status | Mark a user as Active or inactive |
| Board Preference | This is the board the user is in most frequently. |
| Default Source Pull Type | When creating sources this is the type that the source defaults to. |
| Weight Display Type | This is what the user prefers the weight to be set to. |
| Flags (Right Column) | Description |
|---|---|
| Manager | This setting will filter the AR/AP Report by users that you are in charge of. |
| Sales | This will make it so the user name will show up inside the order details as a Sales person. |
| Transportation | This will make it so the user name will show up inside the order details as a Booked By person. |
| Accounting | This will allow the user to make changes to the orders financials after the order has been invoiced. |
| Show Freight and Fees Combined in Profit Matrix | The profit matrix (inside of an order) splits the freight items out from the rest of the fees. This combines them if needed. |
| Update original packed date | Allows the user to update the original packed date |
| Vendor | This shows and hides fields based on the vendor. No Customer pricing will show if this is selected. |
| Customer | This shows and hides fields based on the Customer. No Vendor pricing will show if this is selected. |
| Hide Chat | This will hide the Chat if this is selected. |
| Read Only Settings | This disables all inputs in the application. |
| Show PTI labels on Production Board | This shows and hides the ability to get to PTI labels from the production board. |
| Show Weight Display Dropdown in Navbar | This allows you to see the different Units of Measure that are used by product and adjust it from the Navbar. |
Privileges
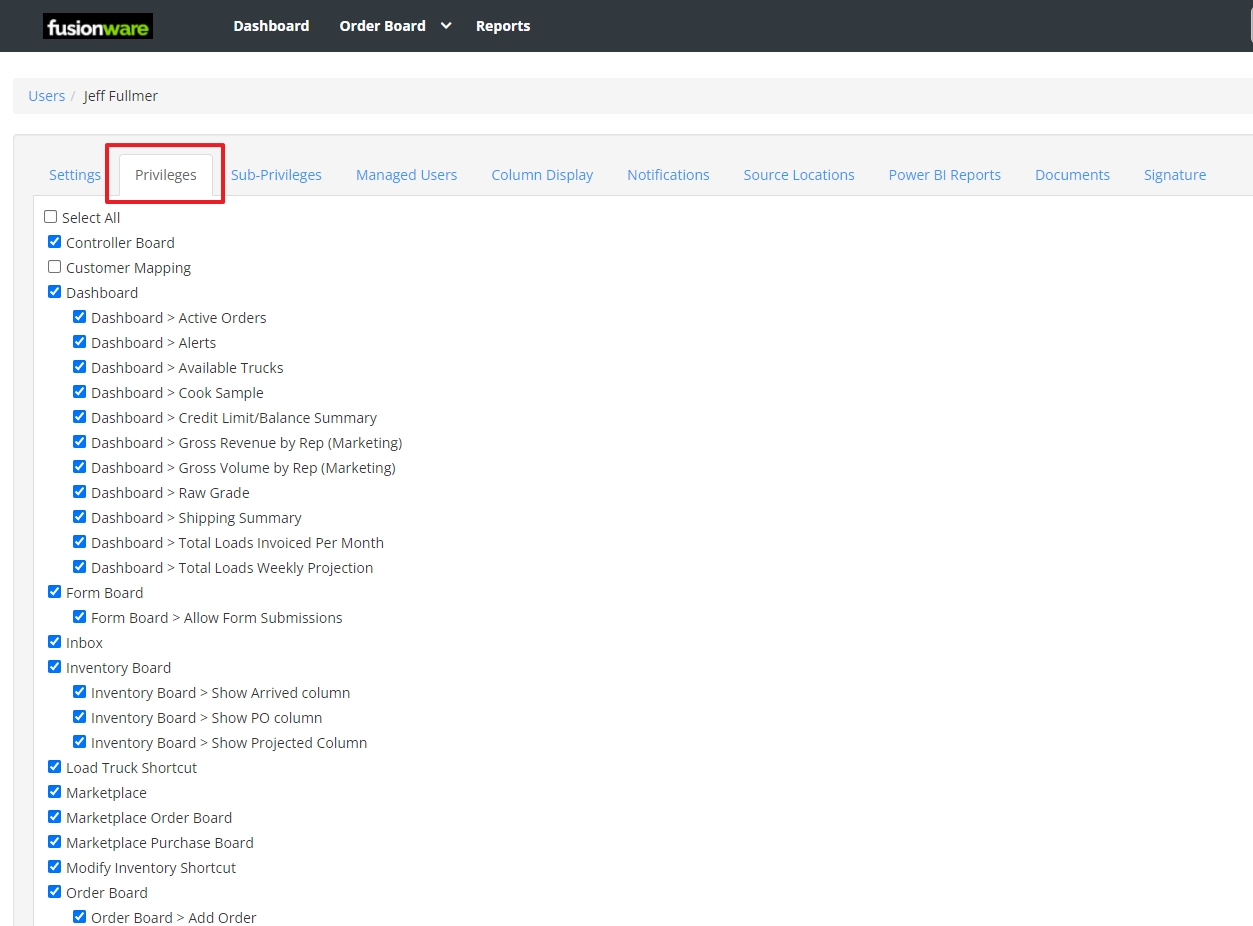
Select the sections of the application you want to give users access to.
| Field Name | Description |
|---|---|
| Select All | Use to select or deselect all the checkboxes |
| Controller Board | |
| Dashboard | The main landing page when you login to Fusionware |
| 1. Dashboard - Active Orders | |
| 2. Dashboard - Available Trucks | |
| 3. Dashboard - Cook Sample | |
| 4. Dashboard - Raw Grade | |
| 5. Dashboard - Shipping Summary | |
| 6. Dashboard - Total Loads Invoiced Per Month | |
| 7. Dashboard - Total Loads Weekly Projection | |
| Form Board Allow Form Submissions | |
| Inventory Board | |
| 1. Inventory Board - Show Arrived Column | |
| 2. Inventory Board - Show PO Column | |
| Modify Inventory Shortcut | |
| Order Board | Gives access to the Order Board page |
| 1. Order Board - Add Order | |
| 2. Order Board - All Orders | |
| 3. Order Board - Carrier Log | |
| 4. Order Board - Edit Customer | |
| 5. Order Board - Edit Suggested Rate | |
| 6. Order Board - Force Order Status | |
| 7. Order Board - Freight Rates | |
| 8. Order Board - Load Truck | |
| 9. Order Board - LTL Module | |
| 10. Order Board - Order Templates | |
| 11. Order Board - Show Contract Checkbox | |
| 12. Order Board - Update Product Line Weight From Loaded | |
| 13. Orders - (Re)send to ERP | |
| 14. Orders - Force ERP Update | |
| 15. Orders - Inventory Allocation | |
| 16. Orders - Line Items on Carrier Confirmation | |
| Process Board | Gives access to the Process Board |
| Production Board | Gives access to the Production Board |
| 1. Production Board - End Run | |
| 2. Production Board - Revert Automated Lot Number | |
| Production Planning Board | Gives access to the Production Planning Board |
| 1. Production Planning Board - Bill of Materials | |
| 2. Production Planning Board - Planner | |
| 3. Production Planning Board - Production | |
| Receiving Board | |
| 1. Receiving Board - Delete Receiving | |
| 3. Receiving Board - Edit Lot Number After Inventory Created | |
| Reports | Gives access to the Reports section |
| 1. Reports - Accounting | |
| 2. Reports - Active/Profit Summary | |
| 3. Reports - Adapter Summary | |
| 4. Reports - Aging | |
| 5. Reports - Binned Inventory Report | |
| 6. Reports - Binned Packout Report | |
| 7. Reports - Booking Summary | |
| 8. Reports - Build Custom Report | |
| 9. Reports - Commodity Sales | |
| 10. Reports - Create Orb Report | |
| 11. Reports - Daily Pick Sheet | |
| 12. Reports - Farms | |
| 13. Reports - Field | |
| 14. Reports - Grower Settlements | |
| 15. Reports - In-Transit Summary | |
| 16. Reports - Inventory | |
| 17. Reports - Inventory Allocate | |
| 18. Reports - Inventory Change Date Dumped | |
| 19. Reports - Inventory Delete | |
| 20. Reports - Inventory Undump | |
| 21. Reports - Inventory Update | |
| 22. Reports - Invoice Summary | |
| 23. Reports - Packaging | |
| 24. Reports - Production | |
| 25. Reports - Rate Quote Log | |
| 26. Reports - Receiving | |
| 27. Reports - Receiving > Grower Settlement | |
| 28. Reports - Orders By Customer(AR/AP) | |
| 29. Reports - Sales | |
| 30. Reports - Shipped/Sold | |
| 31. Reports - Storage | |
| 32. Reports - Trace Recall | |
| 33. Reports - Transfer Inventory | |
| 34. Reports - Transportation | |
| Settings | Gives access to settings |
| 1. Settings - Admin Bulk Inventory Lots Update | |
| 2. Settings - Admin Bulk Inventory Update | |
| 3. Settings - Assets | |
| 4. Settings - Auto Charges | |
| 5. Settings - Button Labels | |
| 6. Settings - Carrier Is Approved | |
| 7. Settings - Carrier Is Approved for Advances | |
| 8. Settings - Carriers | |
| 9. Settings - Chemicals | |
| 10. Settings - Colors | |
| 11. Settings - Commodities | |
| 12. Settings - Company Groups | |
| 13. Settings - Contracts | |
| 14. Settings - Contracts Admin | |
| 15. Settings - Custom Reports | |
| 16. Settings - Customer Is Approved | |
| 17. Settings - Customers,Vendors/Growers | |
| 18. Settings - Drivers | |
| 19. Settings - Enter Calbee Order Data | |
| 20. Settings - Enter Frito QC Data | |
| 21. Settings - Enter HEB Data | |
| 22. Settings - Enter Shearer’s Data | |
| 23. Settings - Factoring Companies | |
| 24. Settings - Fields | |
| 25. Settings - Form Builder | |
| 26. Settings - Items | |
| 27. Settings - Labels | |
| 28. Settings - Locations | |
| 29. Settings - Order Templates | |
| 30. Settings - Packaging | |
| 31. Settings - Print Label | |
| 32. Settings - Product Sizes | |
| 33. Settings - Product Styles | |
| 33. Settings - Products | |
| 34. Settings - Products Edit ERP Ref | |
| 35. Settings - PTI Labels | |
| 36. Settings - Quality Control | |
| 37. Settings - Receiving Template | |
| 38. Settings - Remote Printers | |
| 39. Settings - Run Profile | |
| 40. Settings - Sale/Pay Terms | |
| 41. Settings - Scales | |
| 42. Settings - Service Failure | |
| 43. Settings - Source - Add Inventory | |
| 44. Settings - Storages | |
| 45. Settings - Users |
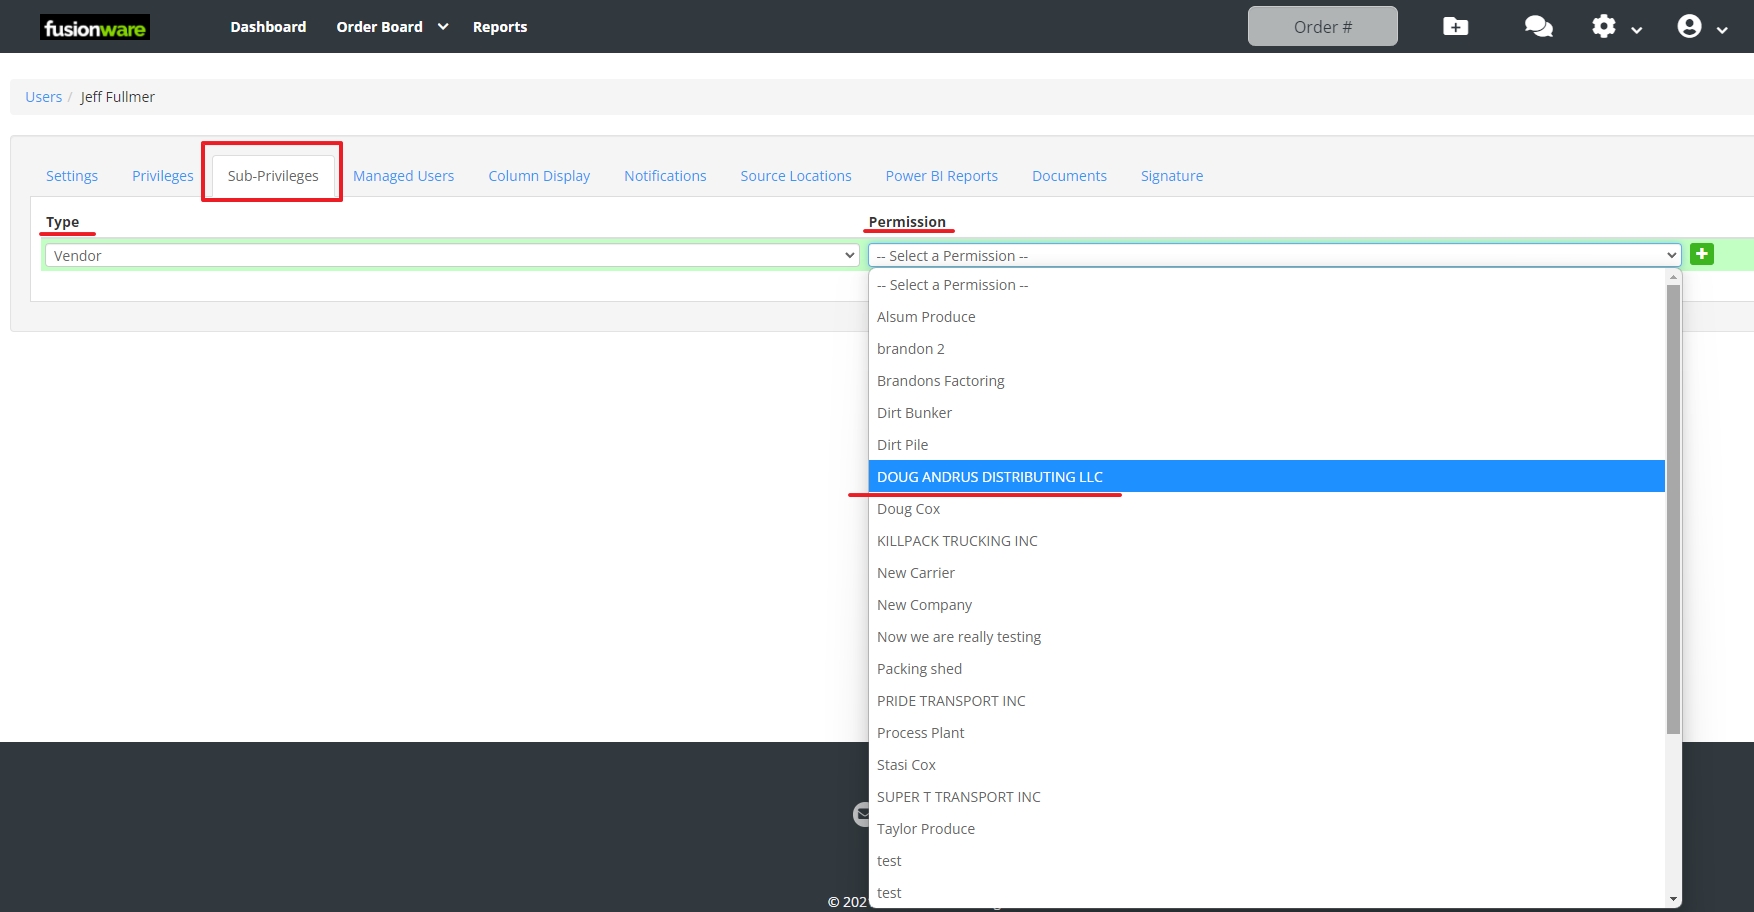
Sub-Privileges
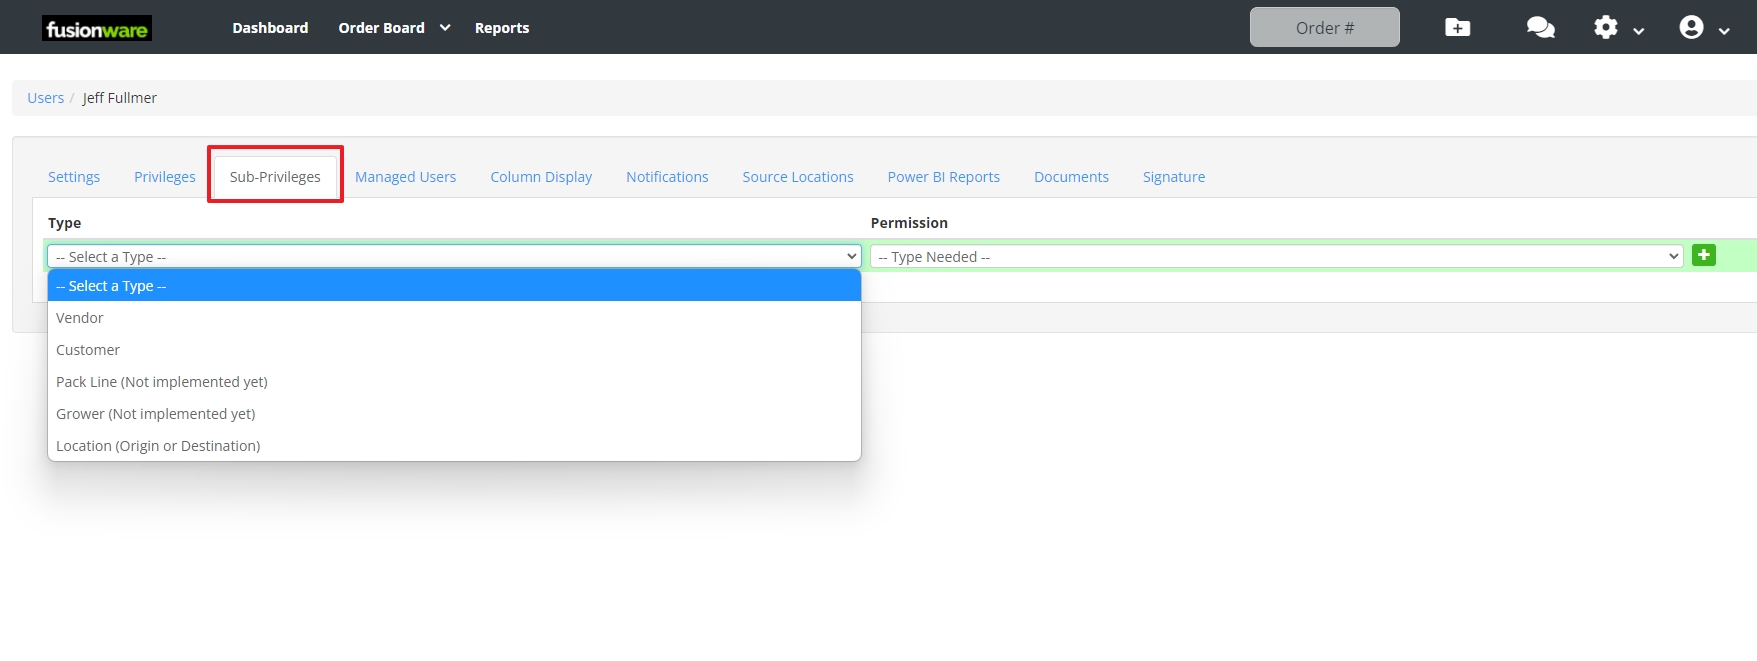
Primarily used to give a Vendor or Customer read-only user access to their orders. Select Vendor or Customer in “Type” then Select the company from the “Permissions” list
Column Display
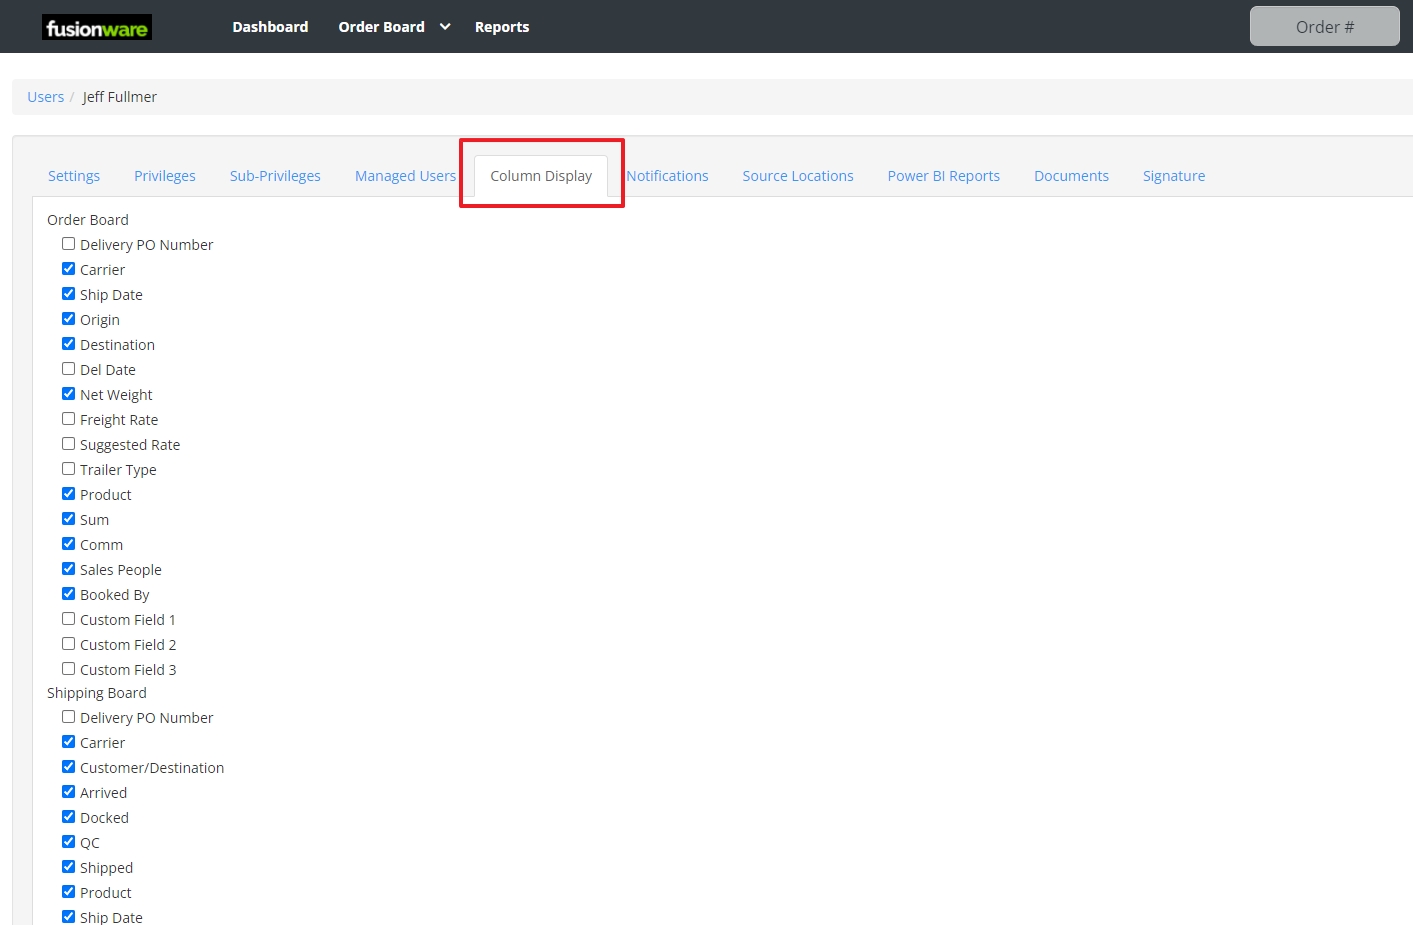
On the different Boards you can add or remove some of the columns for users.
| Field Name | Description |
|---|---|
| Order Board | |
| 1. Delivery PO Number | |
| 2. Carrier | |
| 3. Ship Date | |
| 4. Origin | |
| 5. Destination | |
| 6. Del Date | |
| 7. Net Weight | |
| 8. Freight Rate | |
| 9. Suggested Rate | |
| 10. Trailer Type | |
| 11. Product | |
| 12. Sum | |
| 13. Comm | |
| 14. Sales People | |
| 15. Booked By | |
| 16. Custom Field 1 | |
| 17. Custom Field 2 | |
| 18. Custom Field 3 | |
| Shipping Board | |
| 1. Delivery PO Number | |
| 2. Carrier | |
| 3. Customer/Destination | |
| 4. Arrived | |
| 5. Docked | |
| 6. QC | |
| 7. Shipped | |
| 8. Product | |
| 9. Ship Date | |
| 10. Tracking | |
| 11. Arrive ETA | |
| 12. Departed Date | |
| 13. Depart By | |
| 14. Del. Date | |
| 15. Origins | |
| 16. Ship Qty | |
| 17. Weight | |
| 18. Contract | |
| 19. Comments | |
| 20. Custom Field 1 | |
| 21. Custom Field 2 | |
| 22. Custom Field 3 | |
| Inventory Report | |
| 1. Field Name | |
| 2. ERP Label | |
| 3. Product ERP Ref | |
| 4. Product Xref | |
| 5. Printer | |
| 6. Grower | |
| 7. Packed At | |
| 8. Original Pack Date | |
| 9. Destination | |
| 10. Product Variety | |
| 11. Product Commodity | |
| 12. Current Location | |
| 13. Production Line | |
| 14. Pallet Type | |
| 15. Dispatch Date | |
| Receiving Board | |
| 1. Date | |
| 2. Ref # | |
| 3. Dispatch | |
| 4. Lots | |
| 5. Field Block # | |
| 6. Growers | |
| 7. Location | |
| 8. Commodity Product | |
| 9. Qty | |
| 10. Weight | |
| 11. Truck # | |
| 12. Driver | |
| 13. Foreman |
Notifications
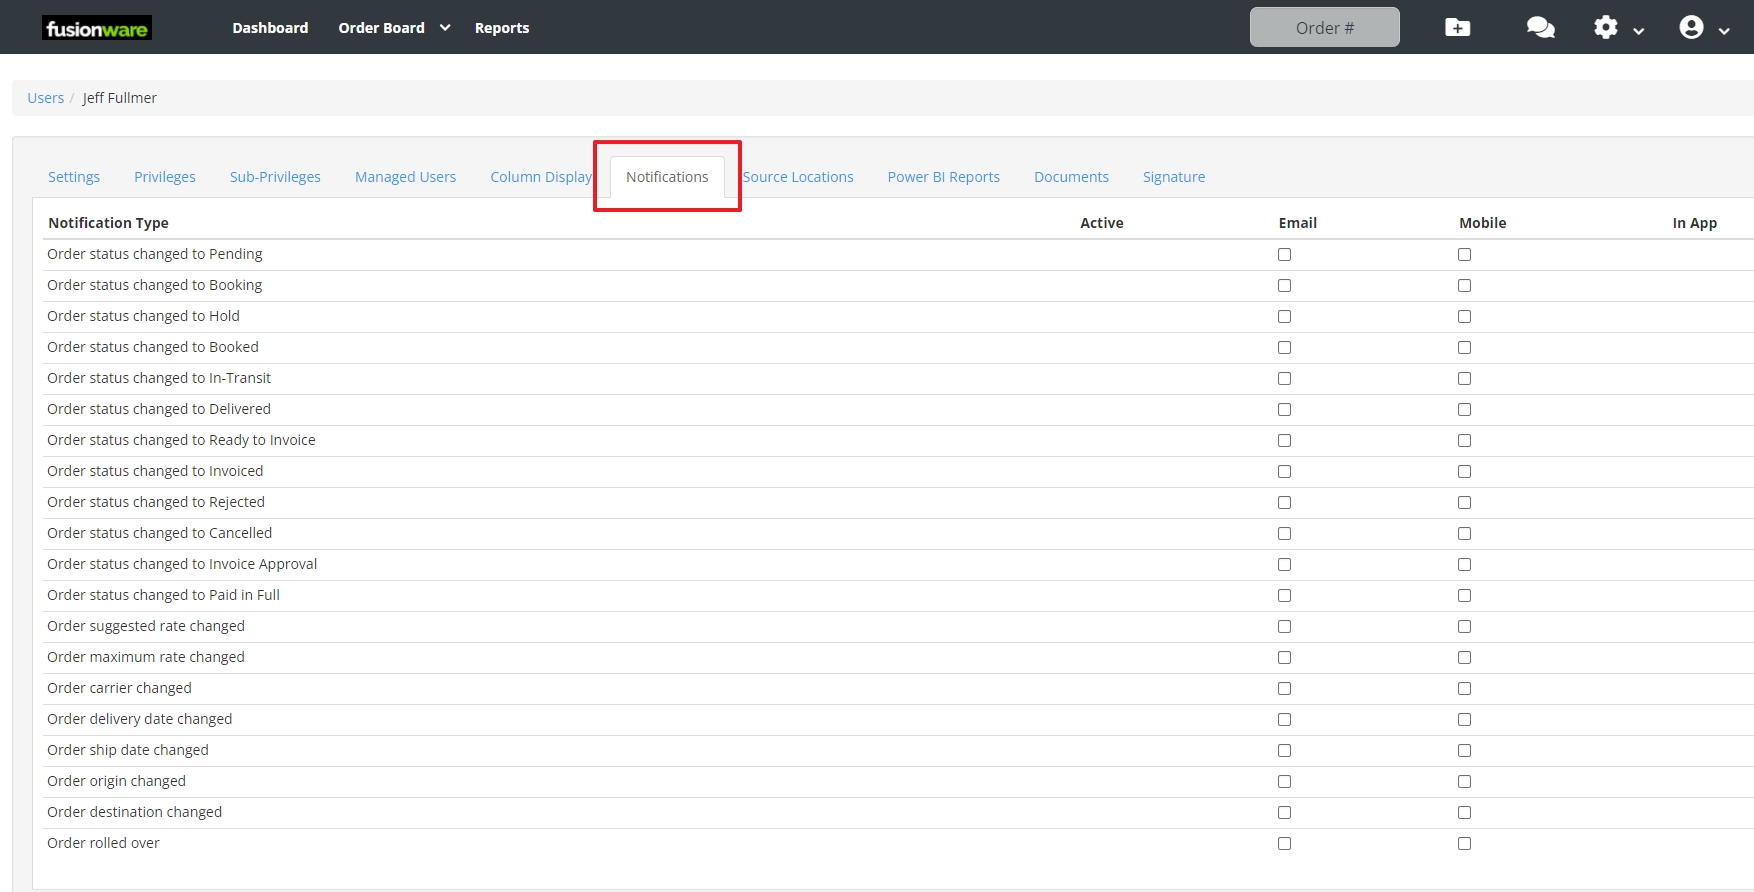
For order notifications to work the user needs to be the Booked By OR Sales Person on the order to receive the notifications. The notifications can be sent by email or mobile. The user must have an email and/or mobile number entered on their profile to receive email or mobile notifications.
Source Locations

To see and access inventory, along with accessing other features around inventory, users must have the Source Location (Shed) added that is tied to that inventory.
- Example 1: A user is trying to load a truck but has errors when they try to add the inventory.
- In user settings under the Source Locations tab add the location of where the inventory was created at. Any “Shed” location can be added. In the picture above “Packing Shed” is where the user needs to access the inventory to load the truck.
- Example 2: A user goes to the Production Board to print tags but nothing shows up.
- In user settings under Source Locations add the shed location of where the inventory is located.
Signature
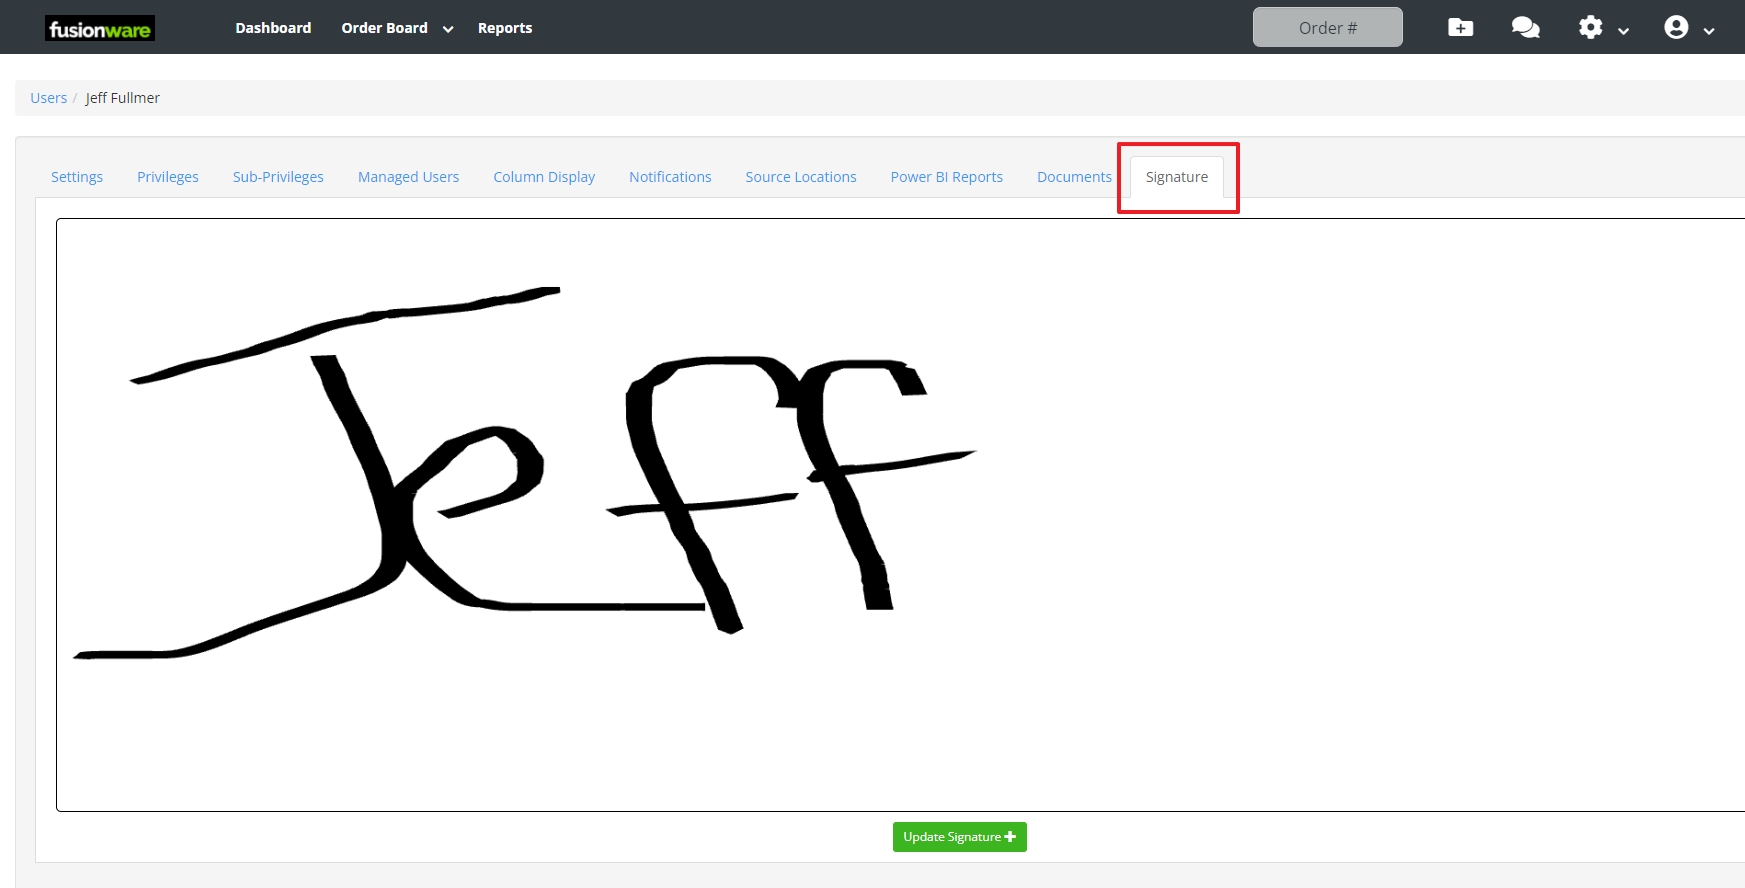
A signature is required for users that are sending documents to be signed by a driver.
Method 1: A signature can be added in the Signature tab under the user settings. The user will need a mobile number added to their user settings to receive a link to set their signature.

Method 2: In the Fusionware mobile app a user can go to their profile name and select it in the menu to create a signature in the mobile app.
